Peanut Butter Blondies

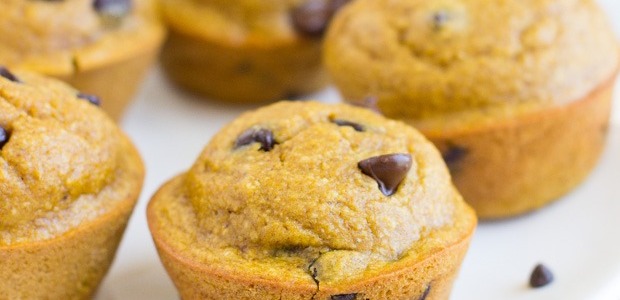
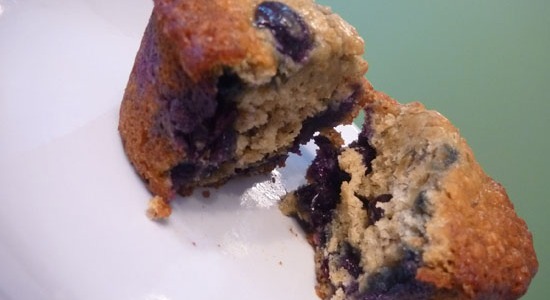
I found this recipe a few days ago on Pintrest and decided to try them in anticipation of Mardi Gras. This one was husband-approved (even AFTER he learned there were chickpeas in it although I will admit I made him try them before I told him what was in it). I love the ooey-gooey consistency of the bars and they are really sweet due to the honey and coconut sugar (yes, I even tried a new sugar for this one…) along with the chocolate chips. Add some banana ice cream and you have one not-quite-so-fattening Fat Tuesday treat! The recipe and picture come from http://joyfoodsunshine.com/healthy-peanut-butter-blondies/

Here’s how to make them:

1 – 15 oz can chickpeas, rinsed and drained

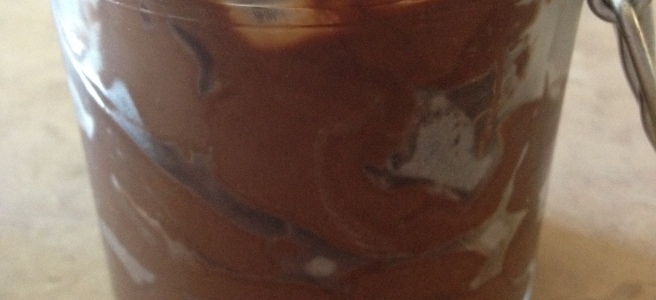
1/2 cup peanut butter

1/4 cup honey

1/4 coconut sugar (you could probably use regular sugar just as easily but the coconut sugar wasn’t hard to find and worked well)

1 tbsp. milk (the recipe calls for almond milk, I used 1% cow’s milk)

2 tsp vanilla

1/2 tsp salt

1/2 tsp baking powder

1/4 tsp baking soda

1/2 cup chocolate chips (plus a few more for on top)

  1. Preheat oven to 350 degF and grease an 8×8 baking dish.
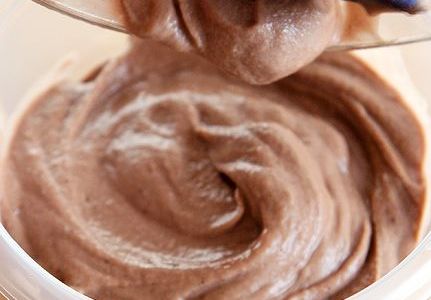
  2. Add all ingredients except chocolate chips to food processor and mix until smooth.
  3. Add chocolate chips and mix by hand.
  4. Spread into prepared baking dish.
  5. Sprinkle a few chocolate chips over the top (and sea salt if you would like).
  6. Bake for 20-30 minutes, until top is set and golden brown and edges have just started to pull away from pan.
  7. Let cool for 15 minutes and then serve.

I’m thinking the addition of some walnuts or pecans would add a nice touch as well. I also plan at some point try the above recipe with chopped nuts in place of the chocolate chips, I’m thinking it will have a butter-pecan kind of flavor and would be good for those who don’t like or can’t have chocolate.

Pumpkin Muffins

As you could probably tell by the previous post, one of my favorite fall flavors is pumpkin! For the last couple of years, I have been roasting my own pumpkins for fresh pumpkin puree. It’s a little bit more watery than canned pumpkin, but I still love using it. I made these pumpkin muffins for work and they were a huge hit, getting numerous compliments. I love the texture that the ground oatmeal gives and the muffins are super moist and delicious! I tweaked the recipe a little bit and doubled the batch to make sure I had plenty of muffins to go around. The original recipe comes from http://www.makingthymeforhealth.com/healthy-flourless-pumpkin-muffins/#_a5y_p=4289226. Here’s what I did:

2cups pumpkin puree

3/4 cup pure maple syrup

4 eggs

2 tablespoons vanilla extract

1/2 cup milk (I used 1%)

5 cups rolled oats (** If you doubled the original recipe, it would be 4 1/2cups but I did a little more to counteract my watery pumpkin puree, so if you are doing canned pumpkin, use 4 1/2 cups)

2 teaspoons baking powder

1 teaspoon baking soda

1 teaspoon salt

2 teaspoons cinnamon

2 cups chocolate chips (or craisins/raisins, walnuts, pecans, or whatever other add ins you want)

Heat over to 350 degF and line muffin tins for 24 muffins.

Ground oatmeal up into a coarse flour with food processor. Mix other dry ingredients. Then, mix wet ingredients in a bowl and mix with hand mixer or blend in a blender or food processor. Next, add wet ingredients to the dry ingredients, stir until blended and add chocolate chips. Fill the muffin tins, about 3/4 full for each (I use an ice cream scoop to easily and neatly get the batter into the muffin tins). Bake for 20 minutes or so, until the top is a light golden brown. Allow to cool and enjoy!


Chocolate Avocado Pudding

So after the success of the avocado brownies, I decided to try chocolate avocado pudding as well. This one comes from http://wickedspatula.com/paleo-chocolate-pudding/. I made a few adjustments to the recipe but it turned out really well! Here’s the original recipe

  • 1 avocado, pitted and peeled
  • 1/4 cup cocoa powder
  • 1 tbsp. honey
  • 1/4 tsp of vanilla extract

Put in food processor and mix until there are no lumps. So, I had an avalanche of cocoa powder come out of the tin when I was measuring, and not being one to waste ingredients, I decided to put it all in the pudding, it wound up being about 1/2 cup. To compensate, I double the honey and added a splash of heavy whipping cream to giving it a little more liquid. It gave it more of a mousse texture, but still delicious! Feel free to add more honey if you need it sweeter. I’m thinking peanut butter would be a nice addition as well. I think it would also make a nice icing recipe as well…maybe for the brownies from earlier?

Avocado Brownies!

I love a warm, gooey brownie for dessert. Of course, in our efforts to eat healthier, fudgy brownies went right out the window until….I came across this Pinterest gem from The Healthy Maven! Now I’ve seen a lot of recipes for various desserts that give me pause, so I was a little skeptical about these at first, but I had some avocados sitting around and decided to give it a try. One of the things I like about this recipe is that all of the ingredients are likely sitting in your pantry already (except for maybe the coconut flour, I did use regular all purpose flour instead of coconut flour in my version, they still turned out well). The recipe (and photo) come from here: http://www.thehealthymaven.com/2015/08/healthy-avocado-brownies.html

  • 1 large avocado
  • 1/2 cup unsweetened applesauce
  • 1/2 cup maple syrup
  • 1 tsp vanilla extract
  • 3 large eggs
  • 1/2 cup flour
  • 1/2 cup cocoa powder
  • 1/4 tsp sea salt
  • 1 tsp baking soda

Mix avocado, applesauce, syrup, and vanilla extract (I used a blender). Then whisk  eggs and stir in avocado mixture. Add in flour, cocoa powder, sea salt, and baking soda. Place in greased 8×8 pan and bake for 350 deg for 20-25 minutes. Serve with whipped cream, ice cream (maybe the banana ice cream…see earlier post), or just enjoy on their own. Delish!


Cheesecake!

I am always in search of a good dessert and there are few things than can top cheesecake. This healthy adaptation is a great way to enjoy a classic dessert without crashing your healthy eating efforts. The recipe and picture come from https://healthyfeelshappy.com/2014/07/31/21-day-fix-approved-cheesecake/

This is a recipe approved for the 21 day fix diet, if you’re into that sort of thing. I also added my own crust to this recipe to add a little something extra…I can’t speak to if that is 21 day fix approved or not but it’s completely optional. You can top this with a variety of different berries, top it with nothing, or drizzle with chocolate and caramel if you want to quit counting calories for a little while. I double this recipe to make a 9 inch cheesecake (the original calls for a 6 inch pan).

  • 1 cup low fat cottage cheese
  • 1/4 cup nonfat Greek yogurt (I have used plain and vanilla flavored)
  • 1 large egg
  • 2.5 tablespoons sugar
  • 1.5 tablespoons flour
  • ½ teaspoon vanilla extract
  • ½ tablespoon lemon zest

Blend cottage cheese and yogurt in a food processor until smooth, then add in other ingredients and blend until well mixed. Pour mixture into greased springform pan (or prepared crust, see below) and bake in a preheated 350 deg oven. Bake for about 30 minutes, or until the top starts to pull away from the pan and the cheesecake is just slightly jiggly. Cool completely before serving.

For Crust,

Blend 1 cup of pecans (or a mix of nuts if you desire) with 1/2 cup of whole wheat flour and 2 tbsp. melted butter in a food processor. I drizzle in a tsp or so of honey for sweetness as well. Once crumbly, press into bottom and up the sides of a springform pan. Bake at 350 deg for 10-15 minutes until browned a little. Fill with filling above and bake as directed.

Banana Blueberry Oatmeal Muffins

Breakfast for both my husband and I are usually on the  go in the mornings. I tried these muffins a couple of weeks ago after a friend tried them and let me sample. These muffins pack in oatmeal, along with bananas and blueberries for a hearty, easy to eat on the run morning treat! The recipe and picture come from http://www.domesticadventure.com/2011/02/tasty-tuesday-banana-blueberry-oatmeal-muffins/

INGREDIENTS:

  • 1 cup flour
  • 1 cup oatmeal
  • 1 tsp baking soda
  • 1/2 tsp salt
  • 4 TBS unsalted butter
  • 1/3 cup sugar
  • 1/3 cup brown sugar
  • 2 large eggs
  • 2 ripe bananas, mashed
  • 1/3 cup milk
  • 1 tsp vanilla extract
  • 1 pint fresh or frozen blueberries

INSTRUCTIONS:

Preheat your oven to 375 degrees.  Combine the flour, oatmeal, baking soda and salt, and set aside. In your mixer, cream butter and sugars until light and fluffy. While mixing, add one egg at a time and combine well.  Then add in milk, vanilla and banana; mix well. Stir in flour/oatmeal mixture with as few strokes as possible and then add blueberries. Divide the batter evenly in your well-greased muffin pans. Bake for 25 – 28 minutes at 375 degrees, or until a toothpick comes out clean.

Banana Ice Cream

We do not eat ice cream very much in our home, but this healthier version is allowing us to enjoy it more often. The great thing about this is that it can be adapted for whatever taste you might have…we usually do bananas with peanut butter, but I am planning to do bananas with vanilla bean soon. You can top with any of your favorite ice cream toppings, we like to do chocolate chips. You can even throw in some of the energy bites posted previously which is reminiscent of cookie dough ice cream (my favorite…). I think you could sub peaches or strawberries for the bananas for an even more refreshing summer treat! The base recipe along with the picture comes from http://userealbutter.com/2010/08/12/single-ingredient-ice-cream-recipe/


4 bananas, just slightly overripe (brown spots good, completely black not so good)
2 tbsps creamy peanut butter (optional – thus 2 ingredient ice cream)
2 tsps cocoa powder (Dutch process), (optional – thus 2 or 3 ingredient ice cream depending on peanut butter)

DO NOT FREEZE THE WHOLE BANANA, you’ll have a heck of a time blending that beast.

Peel the bananas and slice them up into 1/4 to 1/2 inch thick disks. Place the banana slices in the freezer for about an hour or until they are frozen solid. Put the frozen slices in a food processor and pulse. First they will start to resemble gravel, but keep going. The bananas will soon turn into a frozen mush – at this point, start scraping the sides down (you will do this a lot). Or you could add a dash of milk (or yogurt) since the liquid will help the blending. So after a few minutes of stopping to scrape the sides down, the banana begins to blend into a creamy texture. When the bananas look like whipped ice cream, you can add your mix-ins like peanut butter and/or cocoa powder, chocolate chips, toffee, raspberries, anything goes! Straight out of the food processor, the ice cream is like soft serve. You can also freeze it for a firmer texture. I find it’s pretty hard (and therefore, brittle) when I scoop it immediately after removing it from the freezer. Just give it a minute or two to soften up. Makes a pint.